Parsing spreadsheets and generating images with Python
In my day job I mainly code in Typescript, but every now and then I like to use python to parse some data and automate some stuff for me. I’m writing this guide as a future reference for myself and beginners who had never used pandas or PIL before.

I recently bought a board game here in Taiwan and it came with cards written in Chinese. I get together with friends from different countries and many of them can’t read Chinese so I decided to translate the cards. Luckily, there’s this amazing website for board game nerds called BGG, that has a huge database of board games and people can upload files and other information related to the games. There I found an excel spreadsheet with all the cards in English.
I decided to parse the spreadsheet and generate labels for the cards so I could paste on top of the original Chinese text, here is how I did it.
Parsing the spreadsheet
For parsing the spreadsheet I used pandas a super popular library for Python. I installed it using:
and imported with
import pandas as pdNow I need to parse the data in the spreadsheet into a cardsList , an array of dictionaries, containing the data for each card.
cards = pd.read_excel('KingOfTokyo_CardList_xls.xlsx')

cardsList = []
With pandas the first row of each column will be the column title, and you can access the column like this spreadsheet[‘columnTitle’], so in my cards spreadsheet I can access the Name column by using cards[‘Name’]

However I also need to parse the cards row by row, so I will use pandas iterrrows() method to loop through each row and add the card data to the card List like this:
for index, row in cards.iterrows():

  cardsList.append({

  "name": str(row['Name']),

  "type": row['Type'],

  "ability": row['Ability']

  })
That’s all the data we need from the spreadsheet, now we need to generate the labels.
Generating images
We will use another highly popular library for generating the translated labels for the cards, it’s called Pillow.
pip install pillowWe will need the Image, ImageDraw and ImageFont modules.We will first set the fonts that we will be using and the image size in pixels, I used different fonts for the card’s name, type and ability fields:
python fontMedium = ImageFont.truetype("Roboto-Bold.ttf", 17)

fontItalic = ImageFont.truetype("Roboto-Italic.ttf", 12)

fontRegular = ImageFont.truetype("Merge3.ttf", 15)

width =375

height =130
Then we will define a renderCard function to render the image, we will use the Image.new method to create the image, passing a color parameter to define the image’s background color. After we will use the ImageDraw module to draw a rectangle outline around the image and to render the text:
def renderCard(card):

  print(str(card['name']))
  img = Image.new('RGB', (width, height), color='white')
  draw = ImageDraw.Draw(img)
  draw.rectangle([width -1 , 0, 0, height ], outline="black", width=2)
  draw.text([5, 0, 2, 0 ], card['name'],
  font=fontMedium,
  fill="black",
  align="center")
  draw.text([330, 0, 2, 0 ], card['type'],
  font=fontItalic,
  fill="black",
  align="center")
However the card’s ‘ability’ property can have texts that are longer than the image’s width and the PIL library doesn’t handle multi-line text by default. So I did some searching and found a solution from a question on Stack Overflow, we will need to import Python’s inbuilt textwrap module:
python import textwrap

defdraw_multiple_line_text(image, draw,
text, font, text_color, text_start_height):

  '''

  From unutbu on [python PIL draw multiline text on image]
  (https://stackoverflow.com/a/7698300/395857)

  '''

  image_width, image_height = image.size
  y_text = text_start_height
  lines = textwrap.wrap(text, width=50)

  for line in lines:
    line_width, line_height = font.getsize(line)
    draw.text(((image_width - line_width) /2,
    y_text),
    line,
    font=font,
    fill=text_color,
    align="left")
    y_text += line_height
We will need to pass a PIL Image and ImageDraw, as well as the text to be rendered, the font to be used, text color and the text’s starting y-axis position relative to the image height. The function will then render the text lines using textwrap’s wrap() method, which takes a width parameter that is the max number of characters per line. We will then render each line using the ImageDraw’s text() method.
So now we just need to add the multi-line text function to our renderCards function and use the Image’s save() method to save the image, setting the resolution and quality parameters:
def renderCard(card):

  print(str(card['name']))
  img = Image.new('RGB', (width, height),
  color='white')

  draw = ImageDraw.Draw(img)

  draw.rectangle([width -1 , 0, 0, height ],
  outline="black", width=2)
  draw.text([5, 0, 2, 0 ], card['name'],
  font=fontMedium, fill="black", align="center")
  draw.text([330, 0, 2, 0 ], card['type'],
  font=fontItalic, fill="black", align="center")
  draw_multiple_line_text(img, draw, card['ability'],
  fontRegular, "black", 25)

  img.save(card['name'] +'.png',
  dpi=(150,150), quality=100)
then we just run renderCards for each card in our cardList :
for card in cardsList:
  renderCard(card)
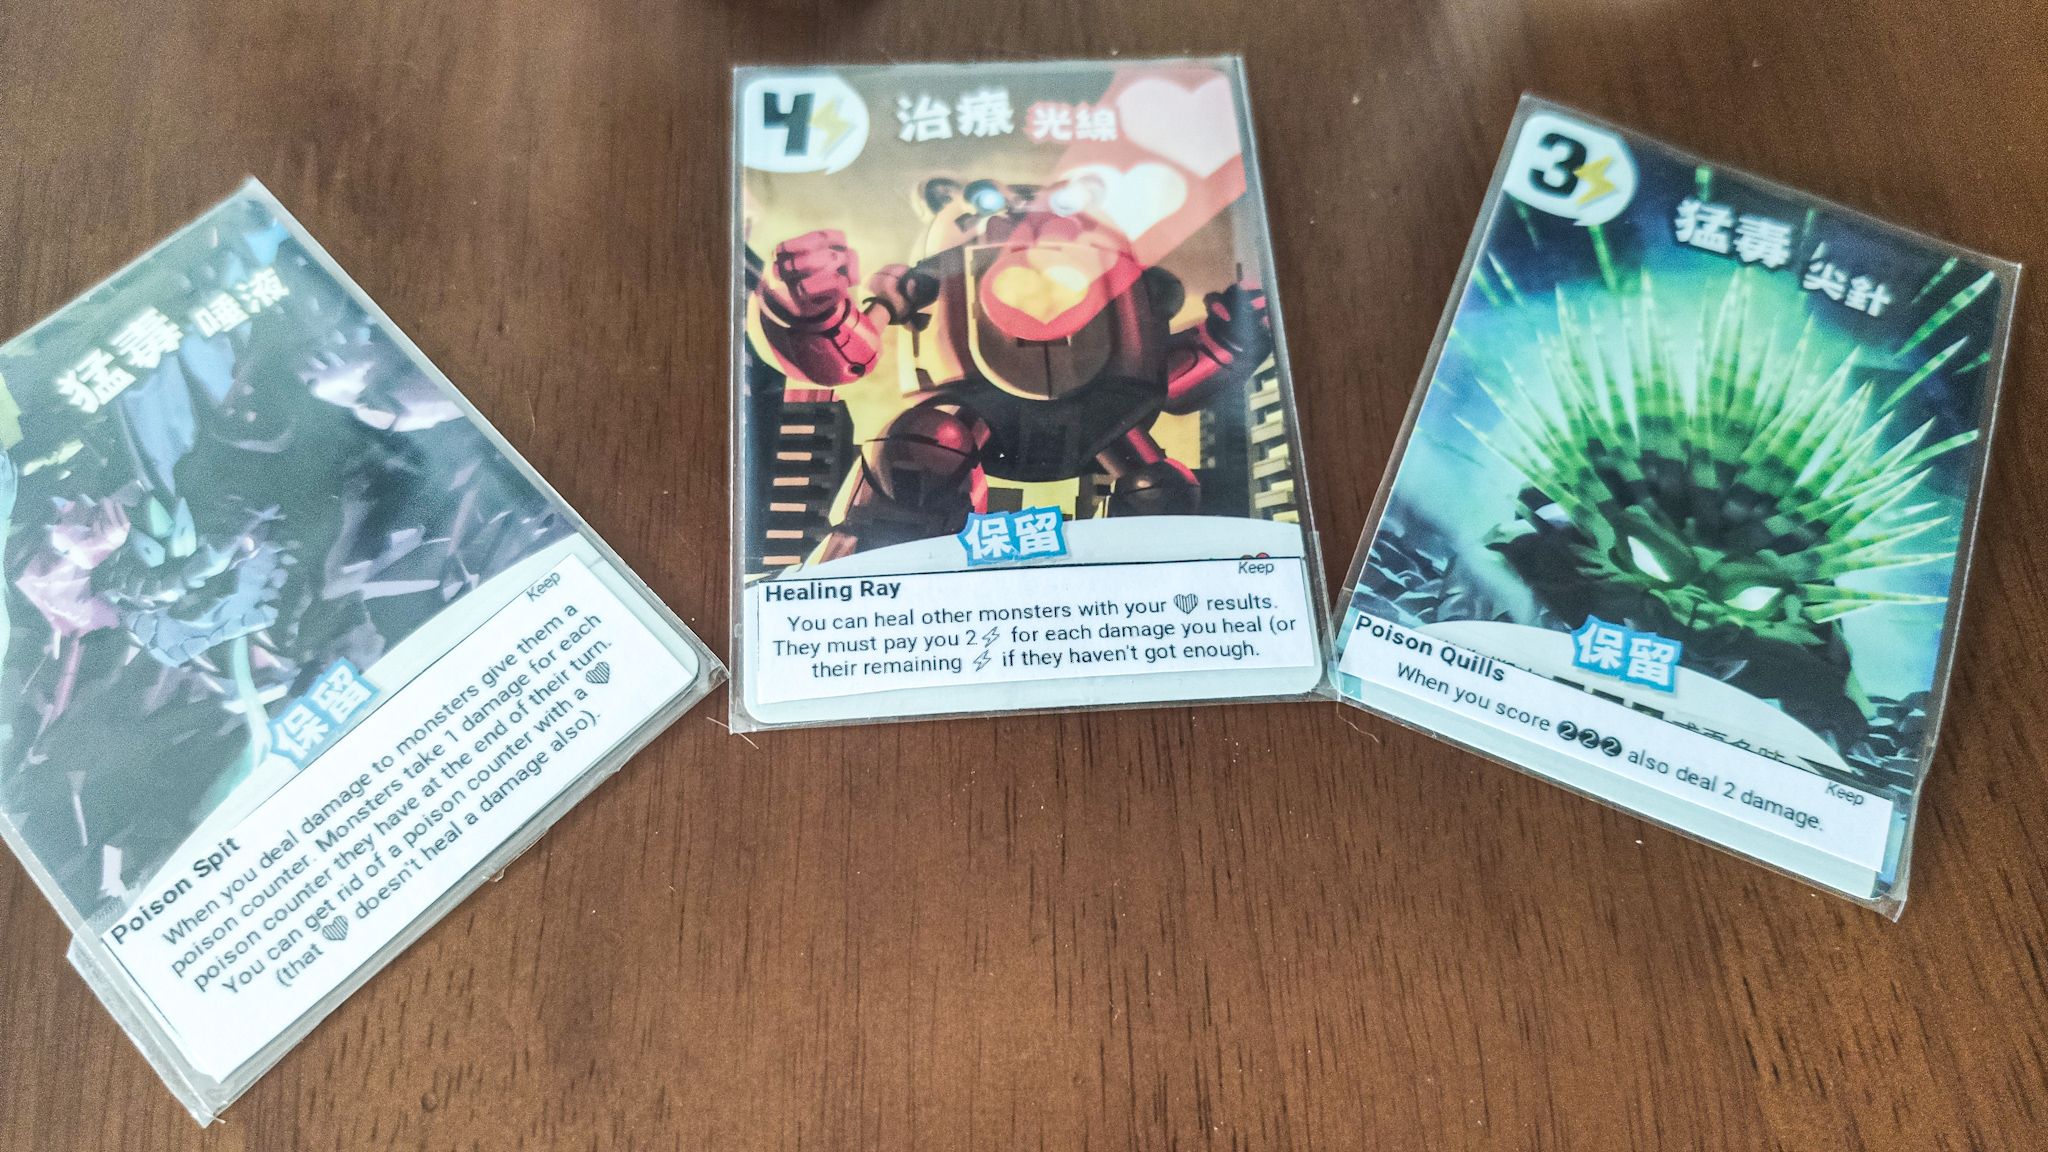
This was my final result after I printed and glued the labels on the cards :

You can check the final code for this project here